USDC: How to Add to MetaMask
The USDC is a stablecoin matched 1:1 with the US Dollar. This coin is available to add to various crypto wallets, including MetaMask. Here’s how to add USDC to your MetaMask wallet.
How to Add USDC to MetaMask Wallet
Before adding USD coins to your MetaMask wallet, you should first establish what network you want to hold USDC on (e.g. Polygon, Ethereum, etc.) Once you choose your network, you have to find that network’s correct address.
Coingecko is a good resource for finding the correct address for your choice of a network to deposit USDC. Here is a simple 4-step guide to get started:
- Visit the Coingecko USDC page.
- Select the ‘Contract’ button underneath the ‘Info’ heading on the top right of the page.
- Find the network you want to add USDC on your MetaMask Wallet for.
- Click the MetaMask icon, the service will automatically add USDC to your MetaMask account.
The USDC should be visible immediately upon completion of step 4. If you don’t have a MetaMask account already, be sure to create one prior to these steps. If you have one, you can link the account to Coingecko, in order to quickly add your USDC to your network of choice.
MetaMask wallets are non-custodial and have no central authority controlling them. Furthermore, the USDC contract addresses on Coingecko have been verified and approved by the respective networks. This means that your coins will be safe and secure in the MetaMask wallet.
Add USDC to MetaMask

Summary: The Coingecko platform provides the most convenient means of adding any USDC contract address to MetaMask Wallet. Coingecko’s USDC page offers the ability to efficiently filter verified contract addresses from various networks and add them to the wallet through a simple button click.
You can continue reading our step-by-step guide to learn how to get started in seconds.
Content Guide
How to Add USDC to a MetaMask Wallet
The method of adding USD Coin (USDC) to your MetaMask Wallet will vary depending on the network you want to hold the USDC on. This means that users will need to first identify which network (e.g Ethereum or Polygon) they want to deposit the USDC to. Once the network has been identified, it is time to find the correct USDC contract address for that network.
The best way to find verified USDC contract addresses is through the Coingecko platform. They have a dedicated page for USDC which shows all of the different networks with their respective contract addresses. Here is a simple 4 step guide to get started:

- Visit the Coingecko USDC page.
- Select the ‘Contract’ button underneath the ‘Info’ heading on the top right of the page.
- Find the network you want to add USDC on your MetaMask Wallet for.
- Click the MetaMask icon and USDC will be automatically added and visible on your MetaMask account.
What networks is USDC available on?
USDC is the most widely available and safest stablecoin on all major Layer 1 and Layer 2 protocols. These include Ethereum, Polygon, Solana, BNB Chain, Avalanche, Arbitrum, Optimism, METIS and many others.
Is it safe to hold USDC on MetaMask?
Yes, it is absolutely safe to hold USDC on MetaMask. This is because MetaMask wallets are non-custodial and have no central authority controlling them. Furthermore, the USDC contract addresses on Coingecko have been verified and approved by the respective networks.
This means that users can be sure of their safety when using these addresses as they are secure and verified. That said, it is always important to double check with the official USDC website and MetaMask wallet before making any transactions.
Final Thoughts
In conclusion, adding USDC to MetaMask is quite easy. All that is needed is the verified contract address and then the MetaMask button on Coingecko’s page. This ensures that users can hold their USDC safely and securely in their wallets without any risks.
It is important to remember to double check with both the USDC website and the MetaMask wallet before making any transactions to avoid any issues. With these steps, users can enjoy a secure and convenient way to store their USDC assets.
Как добавить usdc в metamask polygon
Как проходить тестнет PAXO
Руководство пользователя
Что нужно для прохождения тестнета PAXO
- кошелек MetaMask
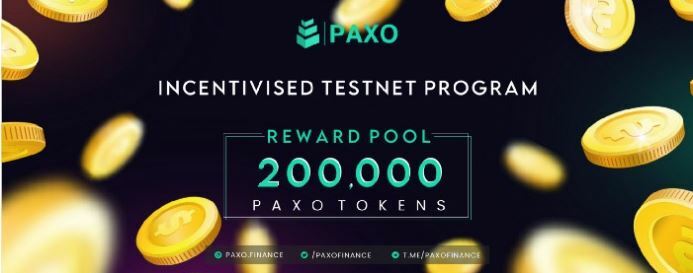
PAXO — это децентрализованный протокол, который открывает возможности обеспеченного заимствования и кредитования в DeFi пространстве.
Дедлайны:
Тестирование запланировано на период с 28 мая по 27 июня 2022 года, и будет проходить в тестовой сети Polygon Mumbai.
Награды:
Участники, что внесут ценный вклад в развитие проекта, разделят пул наград в 200 000 токенов PAXO.
Распределение будет происходить следующим образом:
1–50 место: 2,000 PAXO токенов каждому.
51–100 место: 1,000 PAXO токенов каждому.
101–200 место: 500 PAXO токенов каждому.
Победителей анонсируют 6 июля, а награды распределят после завершения TGE.
1.Первым делом необходимо добавить сеть Polygon Mumbai в наш Metamask
В правом нижнем углу нажимаем “Add Mumbai Network” и подтверждаем в Metamask.
В правом верхнем углу жмём “Connect Wallet” и подтверждаем действие в Metamask.
Нас попросят ввести свой адрес Metamask в Mainnet. Он ничем не отличается от адреса в Testet, поэтому просто копируем свой адрес, вставляем его в соответствующее поле и жмём “Update”. Закрываем окно нажав “Close”.
2.Для выполнения транзакций в сети Polygon Mumbai, нам понадобится некоторое количества токена Matic. Чтобы его получить переходим на сайт крана https://faucet.polygon.technology/
Убедитесь, что на сайте крана в графе “Network” выбрано “Mumbai”, а в поле “Select Token” — “MATIC Token”
Копируем свой адрес Metamask и вставляем в поле “Wallet address”. Далее жмём “Submit”. Через некоторое время нам придут наши токены Matic.
После того как нам пришли токены, возвращаемся на сайт тестнета https://polygontestnet.paxo.finance/
3.Начнём наше тестирование с отправки токенов в “Lending”. Одалживая токены, мы будем получать за это доход, а так же сможем сами брать токены взаймы.
В разделе Dashboard выбираем “Supply”.
В открывшемся окне нам предложат получить токены USDC, которую мы поле отправим в лэндинг.
Жмём “Request USDC” и ждём. Токены должны поступить в течении 10 минут нам на баланс
Чтобы предоставить USDC в лэндинг, сперва нам нужно активировать эту возможность в протоколе. Для этого, в том же окне где мы запрашивали USDC в поле ниже нажмите “Enable” и подтвердите транзакцию в Metamsk
В разделе “Supply” выбираем определённое количество USDC которое мы будем предоставлять, и жмём “Lend”. Подтверждаем транзакцию в Metamask
Если вы всё выполнили правильно, в разделе “Suppply Balance” будет отображаться количество USDC которое мы отправили
4.Далее протестируем функцию “Withdraw” и выведем часть токенов, что мы отправили в лэндинг
Опять выбираем “Supply”
Переходим в раздел “Withdraw” и в соответствующее поле вводим определённое количество токенов для вывода. Жмём “Withdraw” и подтверждаем транзакцию в Metamask
Если вы всё сделали правильно, в поле “Supply Balance” уменьшится количество токенов, по сравнению с прошлым его значением
5.Далее протестируем функцию “Borrow”.
В разделе “Borrow & Invest” выбираем один из предложенных токенов и жмём “Borrow”
Вводим определённое количество токена которое мы буем брать в долг. Так же не забываем выставить “Borrow limit” (в нашем случае значение выставлено на уровне 1,25). Далее жмём “Pay” и подтверждаем транзакцию в Metamask
Для большего пользовательского опыта и нахождения ошибок, вы можете проделать аналогичную операцию и с другими доступными токенами
Если вы всё сделаете правильно, в поле “Borrow Balance” отобразится та сума которую вы взяли в долг
Давайте же выведем те токены которые мы брали взаймы под USDC
Для этого, на панели управления выбираем раздел “Portfolio”
Здесь вы можете увидеть то количество токенов, которые вы отправили в для заимствования, а ещё то, что сами брали взаймы
Выбираем один из предложенных токенов и жмём “Withdraw”
В открывшемся окне жмём “Max”, затем “Withdraw” и подтверждаем транзакцию в Metamask. Тем самым мы получаем те токены, которые хотели получить, предоставляя наши USDC под залог
Аналогичную операцию проделываем с остальными токенами
После того как мы взяли токены в долг, следует погасить наш заем
Возвращаемся обратно в раздел “Portfolio”
В разделе “Borrowing” мы можем погасить сразу все долги по нашим займам. Для этого жмём “Repay”.
В открывшемся окне выбираем Max, затем “Repay”. Далее подтверждаем транзакцию в Metamask.
Сделав всё правильно, значение “Borrow Balance” вернётся к 0. Мы никому ничего больше не должны
На этом мы заканчиваем с тестированием всех предложенных нам функций
Перейдём к выполнению некоторых дополнительных активностей, а именно:
- Подписываемся на твиттер PAXO Finance
- Делаем ретвит даного поста
- Подписываемся на телеграм канал PAXO
- Присоединсяемся к каналу PAXO в дискорд
- Заполняем форму регистрации в тестировании
- Оставляем отзыв о прохождении тестирования
How to Get ETH & USDC on Arbitrum: Step-by-Step Guide
Below is a simple step-by-step guide for the easiest ways to get set up with a crypto wallet containing ETH & USDC on the Arbitrum network.
Step 1: Set up a wallet on Arbitrum
- Install MetaMask (as a browser extension or mobile app) and follow the prompts to securely set up your account.
– Note: alternative wallet providers to MetaMask also exist — a complete list can be foundhere(under the ‘Wallets’ tab). - Add the Arbitrum network to MetaMask
a. Click the network dropdown menu
b. Click the ‘Add Network’ button
c. Enter the following details and click ‘Save’:
— Network Name: Arbitrum One
— New RPC URL: https://arb1.arbitrum.io/rpc
— Chain ID: 42161
— Currency Symbol: ETH
— Block Explorer URL:https://arbiscan.io/
Step 2: Get ETH onto Arbitrum
- Decide how much USDC you want on Arbitrum, and calculate the equivalent ETH amount using this calculator.
- Add an additional 0.01 ETH to cover costs for ~100 transactions on Arbitrum.
- Follow any of the methods below to get that total ETH amount onto Arbitrum:
Method 1 — Withdraw ETH from a centralized exchange
If you already hold crypto on a supported exchange, we recommend this method.
Withdraw ETH directly to your Arbitrum wallet from a supported exchange (Binance, KuCoin, Huobi, OKX, Bybit, Crypto.com, MEXC).
Method 2 — Bridge ETH from a different chain
If you already hold crypto on a non-Arbitrum chain, we recommend this method.
Bridge ETH from your current chain to Arbitrum using Connext.
Supported chains include Ethereum, BNB Smart Chain, Avalanche, Fantom, Optimism, and more.
Method 3 — Use a Fiat On-Ramp
If you don’t hold crypto on-chain or on a supported exchange, we recommend using a fiat on-ramp, which allows you to convert from fiat currencies into crypto in your wallet.
Note: fiat on-ramps will have higher fees, longer processing times, transaction limits, and will only be available for certain regions / currencies / payment methods.
Go to Ramp and follow the prompts.
Make sure to search for and select “ETH on Arbitrum” in the “you get” dropdown list.
Step 3: Swap ETH for USDC on Arbitrum
Now that you have ETH on Arbitrum, you need to swap some of that ETH for USDC (don’t forget to keep 0.01 ETH for transaction costs)!
- Change your MetaMask network to “Arbitrum One”
- Go to Uniswap and connect your wallet
- Swap ETH for USDC
Step 4 (Optional): Import USDC into MetaMask
- Go to the “Assets” tab in MetaMask and click “Import tokens”
- Paste 0xFF970A61A04b1cA14834A43f5dE4533eBDDB5CC8 into the “Token Contract Address” field
- Wait a few seconds for the other fields to be automatically populated (“USDC” for Token Symbol and “6” for Token Decimal), and then click the “Add Custom Token” button
- Confirm the import by clicking the “Import Tokens” button
(your USDC balance should be >0 if you followed this guide)
About prePO ��
prePO is a decentralized trading platform allowing anyone to gain synthetic exposure to any pre-IPO stock or pre-IDO token.
prePO’s mission is to democratize pre-public investing — transforming a world of financial exclusion into a world of permissionless access.