Как сохранить retime curve
Sun Mar 21, 2021 5:03 pm
I need a shortcut to bring up the Retime Curve, with Retime Speed checked, and Retime Frame unchecked. Can I define a keyboard shortcut to do that?
Even better would be a new kind of Track that shows the retime curve below EVERY clip. Edit the speed ramp of the ones you want and leave the rest, then click once to hide the track.
DaVinci Resolve Studio 18.6.2
Microsoft Windows 11 Pro
Dell XPS 8950, 32GB RAM
NVIDIA GeForce RTX 3080 10GB
12th Gen Intel Core i9 — 12900K
Re: Shortcut for Retime Curve?
Sun Mar 21, 2021 5:49 pm
You can assign one to Retime Curve in 17.
Don’t know about the settings.
You NEED training.
You NEED a desktop.
You NEED a calibrated (non-computer) display.
Retime Curve
A feature that allows for detailed adjustments to the timing and speed of a clip using a graphical interface.
What is a retime curve in DaVinci Resolve?
A retime curve in DaVinci Resolve is a feature that allows users to adjust the timing of their video clips in a more precise and flexible manner. It provides a visual representation of the speed changes applied to a clip over time, enabling users to create smooth speed ramps, slow-motion effects, or fast-forward sequences with ease.
The retime curve can be accessed through the retime controls in the software, and it offers different types of curves such as speed warp, frame, and retime frame. Each type of curve provides different ways to manipulate the speed and timing of the clip. By adjusting the curve, users can create custom speed effects that enhance the storytelling and visual impact of their videos.
How to use Retime Curve in DaVinci Resolve?
The Retime Curve in DaVinci Resolve is a powerful tool that allows you to adjust the speed of your clips in a more precise and flexible way. To use it, first, select the clip you want to adjust in the timeline. Then, navigate to the ‘Clip’ menu at the top of the screen and select ‘Retime Curve’. This will open a new panel below your viewer where you can see the speed of your clip represented as a graph.
To adjust the speed, you can add points to the graph by right-clicking and selecting ‘Add Speed Point’. You can then click and drag these points to adjust the speed of your clip. The higher the point on the graph, the faster the clip will play. You can also adjust the curve between points by clicking and dragging, allowing you to create smooth speed ramps. Remember to play back your clip regularly to check the results and make further adjustments as needed.
Why is my Retime Curve not working in DaVinci Resolve?
There could be several reasons why your Retime Curve is not working in DaVinci Resolve. One common issue could be that you have not properly selected the clip you want to adjust. Ensure that the clip is selected in the timeline before you attempt to adjust the Retime Curve.
Another possible issue could be related to the version of DaVinci Resolve you are using. Some features may not work properly or may not be available in older versions of the software. Make sure you are using the latest version of DaVinci Resolve. If none of these solutions work, it could be a bug in the software. In this case, you should report the issue to Blackmagic Design, the company that develops DaVinci Resolve.
How to fix issues with Retime Curve in DaVinci Resolve?
If you’re experiencing issues with the Retime Curve in DaVinci Resolve, there are a few steps you can take to troubleshoot and fix the problem. First, ensure that you’re using the latest version of the software. Outdated versions may have bugs or compatibility issues that can cause problems with various features, including the Retime Curve. You can check for updates by going to the DaVinci Resolve website or through the software’s help menu.
If you’re using the latest version and still experiencing issues, the problem may lie with your specific project or settings. Try resetting the Retime Curve settings to their default values. If this doesn’t work, you may want to try creating a new project to see if the issue persists. If the problem is specific to one project, it could be due to a corrupt file or incompatible media format. In this case, you may need to re-import your media or convert it to a different format. If none of these steps work, consider reaching out to Blackmagic Design’s support team for further assistance.
If you use DaVinci Resolve.
You should try Tella.tv to make some of your videos. Tella is a screen recorder that doesn’t compromise on speed or creativity.
Tella simplifies video creation. Record and edit in a single web app. Combine separate clips and quickly remove mistakes. Apply beautiful backgrounds, layouts, and effects with just a few clicks.
With Tella, you can create promo videos, product demos, how-to videos, and presentation videos that look amazing in minutes, not hours.
UE4 Plugin The Curviest Curve
Кривые активы велики. Они позволяют координировать, сколько параметров меняется со временем визуальным образом. Вопрос в том, что в настоящее время вы можете построить много поплавокских кривых, либо проточные данные в векторные и цветные кривые и разбивают его. Там нет способа назвать параметры, которые вы ездите в кривой, и нет способа увидеть несколько параметров (после 4) в одном активе кривой.
Этот плагин исправляет это. Это позволяет иметь как можно больше кривых, сколько вы хотите хранить в одном активе кривой, так что вы можете легко авторское сложное поведение вы желаете.
- New Curve Asset Type : Curviest (allows as many curves as you want)
- New Blueprint Node: Get Curve Values (generic method to get values out of any curve type, broken into float output pins)
- All the colors
- Live updating — you can edit your curves and see the results in real time while running your game.
- [NEW] Change the curve colors to be whatever you want
- Curves can have names to make them easier to work with
- [NEW] Organize your curves and group them into folders, all in one curve asset
- [NEW] Supports the new Curve Editor in UE 4.24
- Adds support for new Retime and Transform tools to manipulate your curves
- [NEW] Adds the ability to lock curves, a feature missing from UE 4.24!
- Editor: Create and edit complex curve assets
- Run-Time: Use complex curve assets to drive whatever behaviors you want
Пожалуйста, авторизуйтесь для просмотра ссылки.
Для просмотра содержимого вам необходимо авторизоваться.
Обнова V2.4 V4.27
Для просмотра содержимого вам необходимо авторизоваться.
Как ускорить или замедлить видео в DaVinci Resolve

Продолжаем изучать возможности DaVinci Resolve, в этом уроке научимся замедлять и ускорять видео в DaVinci Resolve версии 17. Эффект замедления очень часто встречается в клипах, это так называемое слоу-мо или slow motion (в переводе с английского «замедленное движение»).
Для эффекта slow motion важна техническая сторона, для того чтобы видео смотрелось качественно нужно снимать с повышенным значением fps (частота кадров). Оптимальное значение считается 25 или 30 кадров в секунду. Для замедления в 2 раза, во время съемки fps увеличивают в 2 раза (50 и 60 соответственно). Хочешь замедление в 4 раза снимай на 120 fps.
Как ускорить или замедлить видео в DaVinci Resolve
Выбираем фрагмент видео, щелкаем правой кнопкой и в меню выбираем Change Clip Speed, основной параметр Speed — 100%, при уменьшении значения происходит замедление, а при увеличении ускорение, например значение 200% ускорить фрагмент в 2 раза, соответственно размер на Timeline станет в 2 раза короче.

Speed — процентное изменение скорости
Frames per second — изменение скорости через fps
Duration — изменение скорости через продолжительность клипа
Ripple sequence — подвинет все клипы идущее после клипа с изменением
Reverse Speed — переворачивает видео
Freeze frame — стоп-кадр с места установки Playhead (красная вертикальная черта)
Pitch Correction — изменяет высоту звука (мультяшные изменения)
Keyframes — отвечает за ключевые кадры анимации, либо оставит без изменения либо растянет соответственно вносимым изменениям.
Второй способ более наглядный с большим функционалом Retime Controls, горячие клавиши «Ctrl+R». В результате появляется синяя полоса треугольников на видео клипе:

В этом случае при изменении ширины клипа меняется и его скорость, все настройки Change Clip Speed доступны и в этом режиме. Особенности, при выборе Freeze frame создается только небольшой участок стоп-кадра, который есть возможность редактировать. Add Speed Points позволяет делить клип на участки с различными скоростями.

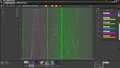
Но и это еще не все, при выборе в меню (права кнопка) Retime Curve появится кривая с ключевыми кадрами для более точной настройки всех эффектов. Появляется возможность изменять скорость не линейно а по кривым — согласитесь интересная опция.
Каким режимом пользоваться Вам решайте сами. Лично для меня второй вариант кажется более наглядным, а значит удобным. Для кинематографичной картинки в совсем клипе совмещай фрагменты повествования с slow motion, смотрится динамично.