View, manage, and install add-ins for Microsoft 365 programs
Excel for Microsoft 365 Word for Microsoft 365 Outlook for Microsoft 365 PowerPoint for Microsoft 365 Access for Microsoft 365 OneNote for Microsoft 365 Project Online Desktop Client Publisher for Microsoft 365 Visio Plan 2 Excel 2021 Word 2021 Outlook 2021 PowerPoint 2021 Access 2021 Project Professional 2021 Project Standard 2021 Publisher 2021 Visio Professional 2021 Visio Standard 2021 OneNote 2021 Excel 2019 Word 2019 Outlook 2019 PowerPoint 2019 Access 2019 Project Professional 2019 Project Standard 2019 Publisher 2019 Visio Professional 2019 Visio Standard 2019 Excel 2016 Word 2016 Outlook 2016 PowerPoint 2016 Access 2016 OneNote 2016 Project Professional 2016 Project Standard 2016 Publisher 2016 Visio Professional 2016 Visio Standard 2016 Excel 2013 Word 2013 Outlook 2013 PowerPoint 2013 Access 2013 OneNote 2013 Project Professional 2013 Project Standard 2013 Publisher 2013 Visio Professional 2013 Visio 2013 Excel 2010 Word 2010 Outlook 2010 PowerPoint 2010 Access 2010 OneNote 2010 Project 2010 Project Standard 2010 Publisher 2010 Visio Premium 2010 Visio 2010 Visio Standard 2010 Excel 2007 Word 2007 Outlook 2007 PowerPoint 2007 Access 2007 OneNote 2007 Publisher 2007 Visio 2007 Visio Standard 2007 InfoPath 2010 InfoPath 2013 InfoPath Filler 2013 SharePoint Workspace 2010 More. Less
When you enable an add-in, it adds custom commands and new features to Microsoft 365 programs that help increase your productivity. Because add-ins can be used by attackers to do harm to your computer, you can use add-in security settings to help protect yourself.
Note: This article only applies to Microsoft 365 applications running on Windows.
View installed add-ins
Alternatively, you can also view your add-ins directly from the Home tab by selecting Add-ins.

Click a heading below for more information.
Add-in categories explained
- Active Application Add-ins Add-ins registered and currently running on your Microsoft 365 program.
- Inactive Application Add-ins These are present on your computer but not currently loaded. For example, XML schemas are active when the document that refers to them is open. Another example is the COM add-in: if a COM add-in is selected, the add-in is active. If the check box is cleared, the add-in is inactive.
- Document Related Add-ins Template files referred to by open documents.
- Disabled Application Add-ins These add-ins are automatically disabled because they are causing Microsoft 365 programs to crash.
- Add-in The title of the add-in.
- Publisher The software developer or organization responsible for creating the add-in.
- Compatibility Look here for any compatibility issues.
- Location This file path indicates where the add-in is installed on your computer.
- Description This text explains the add-in function.
Note: Microsoft Outlook has one add-in option in the Trust Center: Apply macro security settings to installed add-ins. InfoPath has no security settings for add-ins.
Load or unload a template or add-in program
Templates can store styles, AutoText entries, AutoCorrect entries, macros, toolbars, custom menu settings, and shortcut keys. Loading a template makes it available as a global template that you can use while you work with documents based on any other template.
Add-ins are supplemental programs that you can install to extend the capabilities of Microsoft Office Word by adding custom commands and specialized features. An example of an add-in program might be a program designed and distributed by your company’s IT department to highlight company names in any document you open on your computer.
What do you want to do?
- Load templates or add-ins
- Unload templates or add-ins
- Make a template or add-in available whenever you start Word
Load templates or add-ins
When you load a template or add-in, it remains loaded for the current Word session only. If you quit and then restart Word, the template or add-in is not automatically reloaded.
- In Word 2010, 2013, or 2016, select File >Options >Add-Ins. In Word 2007, click the Microsoft Office Button , and then select Word Options >Add-ins.
- In the Manage list, select Word Add-ins, and then click Go.
- Click the Templates tab.
- Under Global templates and add-ins, select the check box next to the template or add-in that you want to load. If the template or add-in you want does not appear in the box, click Add, switch to the folder that contains the template or add-in you want, click it, and then click OK.
Unload templates or add-ins
To conserve memory and increase the speed of Word, it’s a good idea to unload templates and add-in programs you don’t often use. When you unload a template or add-in that’s located in your Startup folder, Word unloads the template for the current Word session but automatically reloads it the next time you start Word. When you unload a template or add-in located in any other folder, it is unavailable until you reload it. To delete a template or add-in from Word, you must remove the template or add-in from the Templates and Add-ins dialog box.
- In Word 2010, 2013, or 2016, select File >Options >Add-Ins. In Word 2007, click the Microsoft Office Button , and then select Word Options >Add-ins.
- In the Manage list, select Word Add-ins, and then click Go.
- Click the Templates tab.
- Do one of the following:
- To unload a template or add-in but leave it under Global templates and add-ins, clear the check box next to the name of the item.
- To unload a template or add-in and remove it from the box under Global templates and add-ins, click the item in the box, and then click Remove.
Note the following about unloading templates or add-ins:
- The Remove button is unavailable when the template you select is located in your Startup folder.
- When you unload a template or add-in, you do not remove it from your computer—you only make it unavailable. The location where you’ve stored the template or add-in determines whether it’s loaded when you start Word.
Make a template or add-in available whenever you start Word
To have a template or add-in available whenever you start Word, store the add-in or template in the Startup folder. To find the current location of the startup folder:
- In Word 2010, 2013, or 2016, select File >Options >Advanced. In Word 2007, click the Microsoft Office Button , and then select Word Options >Advanced.
- Scroll down to General, and then click File Locations.
- Note the location listed for Startup. Save to this location the template or add-in that you want available when you start Word.
Ask Us!: NCU ASC
![]()
Why isn’t the Grammarly Widget opening in my Word document?
Answer
If the floating Grammarly widget does not appear in your Word, Excel, or PowerPoint document, locate the Grammarly icon in your system tray.

Right-click on the Grammarly icon and select Settings.
![]()
Click on Blocked Apps and then Remove to give Grammarly permission to run in Word, Excel, or PowerPoint.

Topics
- Academic Success Center (ASC)
- Grammarly
- Academic Success Center
- Last Updated Dec 20, 2021
- Views 32194
- Answered By Shelley Baker
MS Word reports
Users can create MS Word reports in Creatio and configure them using the Creatio MS Word Report Designer plug-in. Learn more about creating and setting up MS Word reports in the «Set up MS Word reports» article.
Use macros to set up extra data output options for an MS Word report. You can use basic macros and create custom macros.
Basic macros
The general procedure of creating an MS Word report using basic macros is as follows:
- Install the MS Word Report Designer plug-in. This is a one-time procedure. Learn more in the «Installing Creatio plug-in for MS Word» article.
- Add a new report record in the Report setup section.
- Set up the report display parameters
- Set up the report data fields and tables. Add a tag with the name of the macro in the [#MacrosName#] format to the column when setting up column fields.
- Set up the report template layout in the Creatio MS Word Report Designer plug-in and upload the template to Creatio.
The structure of macros in MS Word reports
ColumnName[#Macro name|Arguments#]
The [#Date#] macro
Converts a date to a specified date format. The default date format is » dd.MM.yyyy «. If the date format is not specified, the entered date value will be converted to the default format. A detailed description of date formats is available in the Microsoft documentation. The argument is optional.
ColumnName[#Date#]
If the entered value is » 07/15/2020 11:48:24 AM «, the macro will return » 15.07.2020 «.
ColumnName[#Date|MM/dd/yyyy#]
If the entered value is » 31/01/2019 08:25:48 AM «, the macro will return » 01/31/2019 «.
The [#Lower#] macro
Converts the value of a string to lowercase. The macro has no arguments.
ColumnName[#Lower#]
If the entered value is » ExaMpLe «, the macro will return » example «.
The [#Upper#] macro
Converts the value of a string to uppercase. The argument is optional. If the » FirstChar » argument is passed to the macro, only the first character in the string will be converted to uppercase.
ColumnName[#Upper#]
If the entered value is » example «, the macro will return » EXAMPLE «.
ColumnName[#Upper|FirstChar#]
If the entered value is » example «, the macro will return » Example «.
The [#NumberDigit#] macro
Convert a raw number to a number with digit group separators. The default delimiter is the space character. The argument is optional.
ColumnName[#NumberDigit#]
If the entered value is » 345566777888.567 «, the macro will return » 345 566 777 888.567 «.
ColumnName[#NumberDigit|,#]
If the entered value is » 345566777888.567 «, the macro will return » 345,566,777,888.567 «.
Note. If the fractional part of the number equals zero, only the integer part will be returned. If the entered value is » 345566777888.000 «, the macro will return » 345,566,777,888 «.
The [#Boolean#] macro
Converts a boolean value to a custom representation. The argument is required. The following arguments are available:
- CheckBox – converts the entered value to » ☑ » or » ☐ «.
- Yes,No – converts the entered value to » Yes » or » No «.
ColumnName[#Boolean|CheckBox#]
If the column contains the true value, the macro will return » ☑ «.
ColumnName[#Boolean|Yes,No#]
If the column contains the true value, the macro will return » Yes «.
Custom macros
The Report setup section enables users to create MS Word reports using Creatio tools and configure them using the Creatio MS Word Report Designer plug-in. Learn more about creating and setting up MS Word reports in the «Set up MS Word reports» article.
The general procedure of creating an MS Word report using custom macros is as follows:
- Install the MS Word Report Designer plug-in. This is a one-time procedure. Learn more in the «Installing Creatio plug-in for MS Word» article.
- Add a new report record in the Report setup section.
- Set up the report display parameters
- Implement custom macros.
- Set up the report data fields and tables.
- Set up the report template layout in the Creatio MS Word Report Designer plug-in and upload the template to Creatio.
A macro for setting up an MS Word report is a class implementing the IExpressionConverter interface (see the ExpressionConverterHelper schema of the NUI package).
To make a custom macro callable from the report template, mark the macro with the ExpressionConverterAttribute attribute containing the name of the macro. For example:
[ExpressionConverterAttribute("CurrentUser")]
The Evaluate(object value, string arguments = «») interface method must be implemented in the class. The method accepts an MS Word report template field value as an argument and returns the string type value that will be inserted instead of this field in the ready MS Word report.
The general procedure of creating a custom MS Word report macro is as follows:
- Create a new report in the Report setup section.
- Set up the report display parameters.
- Set up the report data fields and tables.
- Add the Id column to the list of report columns that will be the incoming parameter for the custom macro.
- Add a schema of the Source Code type with a class implementing the IExpressionConverter interface to the custom package. The class must be marked by the ExpressionConverterAttribute attribute with the name of the macro. Implement the Evaluate(object value, string arguments = «») method in it.
- Publish the Source Code type object schema.
- Add a tag with the name of the custom macro in the [#MacrosName#] format to the Id column when setting up column fields.
Transferring the package to another development environment
To transfer the package with the report to another development environment, go to the Configuration section -> the Data tab and bind the data of the following elements:
- SysModuleReport_ReportName – the report. To bind it, use the report Id from the dbo.SysModuleReport database table.
- SysModuleReportTable_ReportName – the tabular component of the report. To bind it, use the report Id from the dbo.SysModuleReportTable database table.
Note. You can view the record Id in the database table even if you do not have access to the database. To do this, display the Id system column in the window of binding data to packages.
Create MS Word report using basic macros
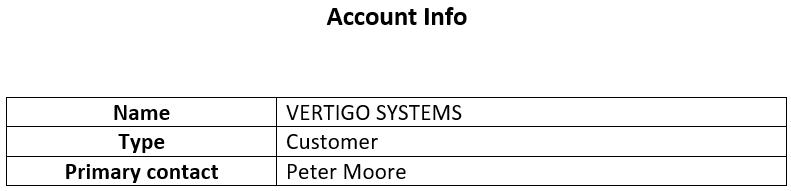
Case. Create an «Account Info» report for the Accounts section edit page to display the following information about the account:
- Name .
- Type .
- Primary contact .
Case implementation algorithm
1. Create a new report

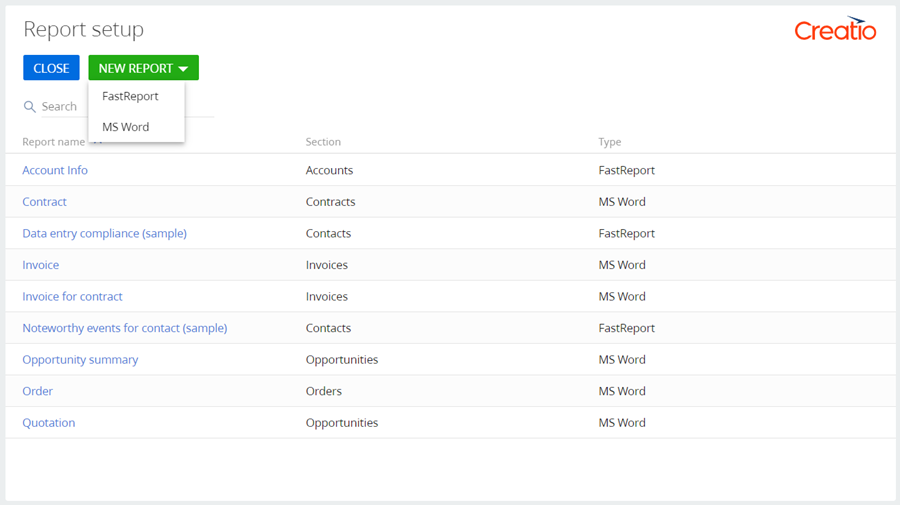
- Open the System Designer by clicking . In the System setup block, click the Report setup link.
- Click New report –> MS Word .

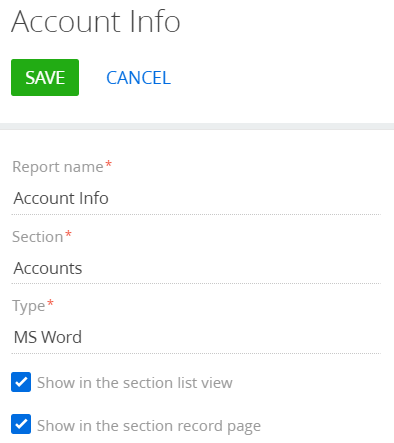
2. Set up the report display parameters
Set the following values in the parameter setup area (2):
- Report title – «Account Info».
- Section – «Accounts».
- Show in the section list view .
- Show in the section record page .
MS Word report setup page
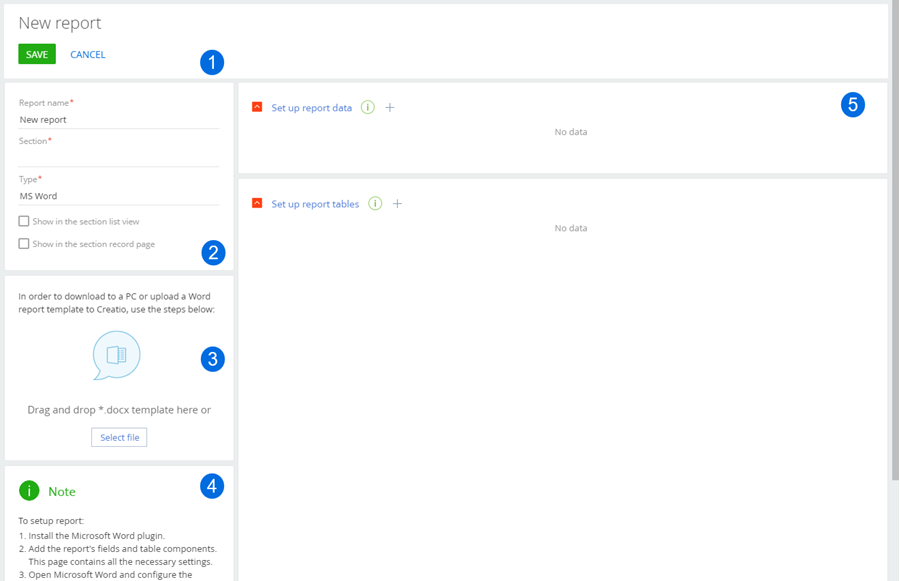
Setting up the report display parameters
3. Set up the report fields

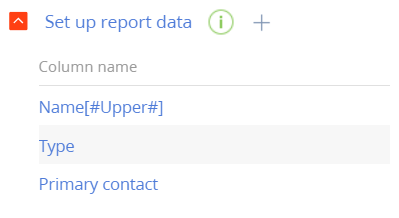
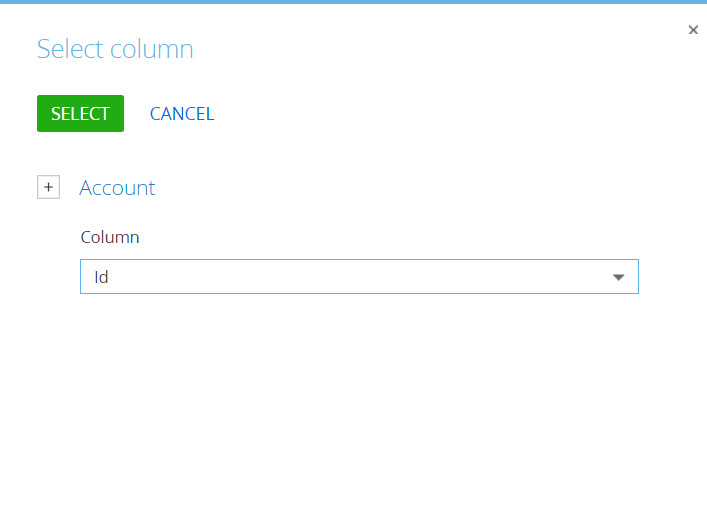
In the Set up report data block of the section working area (5), set up the fields to display in the report. To do this, click and select the Name column in the drop-down Column list. A macro will be added to the column later.
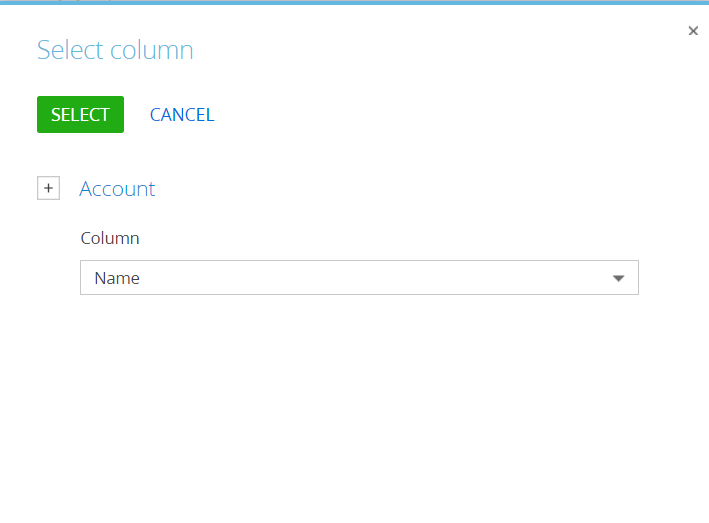
Using the same method, add the Type and Primary contact columns to the template.
The list of columns after this step is presented below.
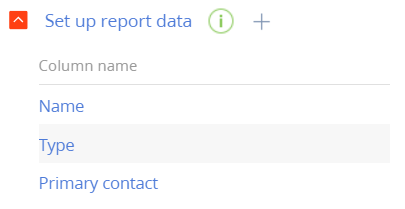
4. Add the macro tag to the column name
Change the Name column property. To do this, take the following steps;

- In the Set up report data block of the section working area (5), double-click the title of the Name column or click in the column title bar.
- Change the [Name] value of the Title field to [Name[#Upper#]] .
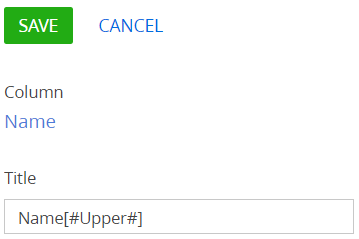
The list of columns after adding macro tags is presented below .
5. Set up the report template layout and upload the template to Creatio
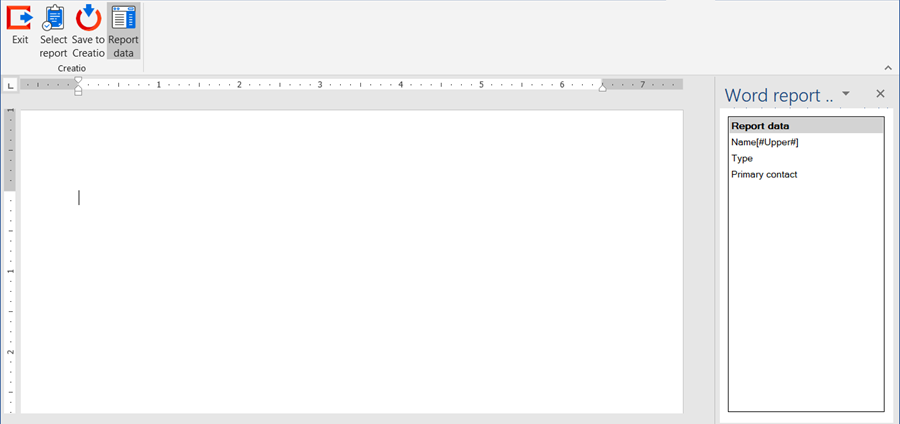
To set up the template:
- Open any MS Word file.
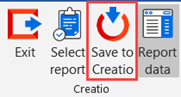
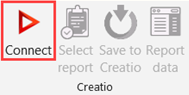
- Click Connect on the Creatio plug-in toolbar.
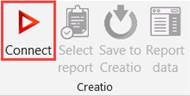

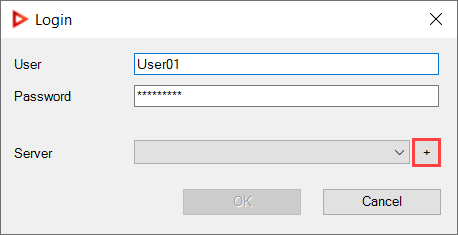
Enter the username and password of the Creatio user. Click next to the Server field.


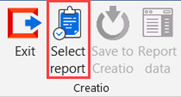
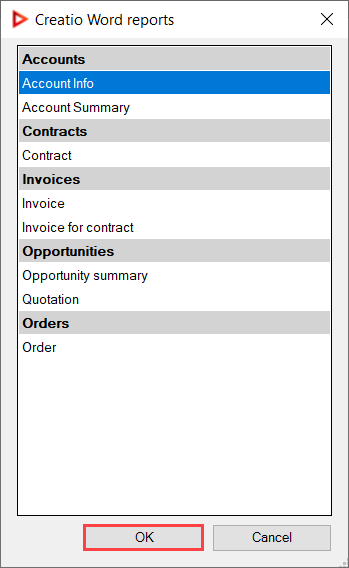
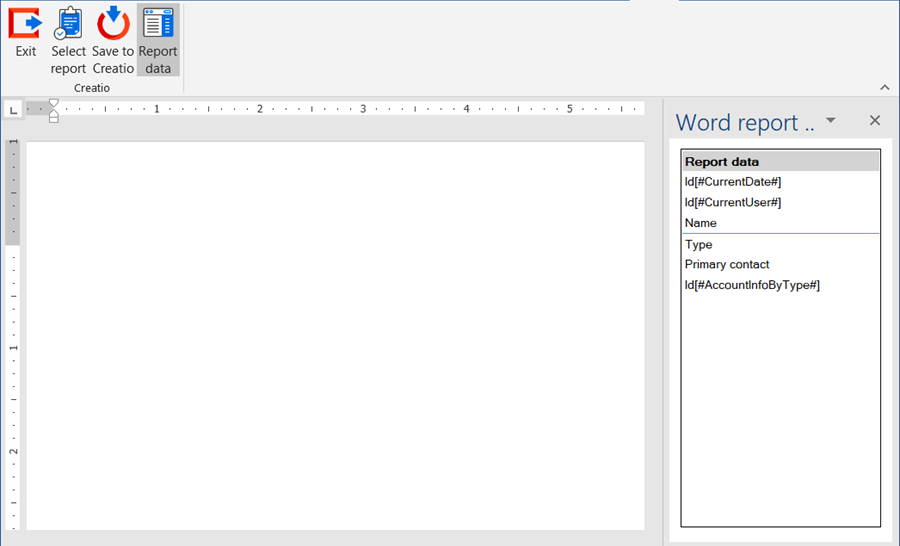
The report setup window looks as follows:
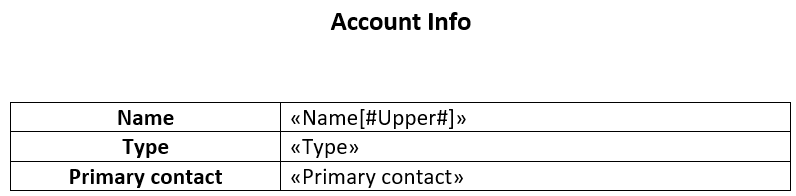
As a result, the «Account Info» report will be available in the Accounts section list under Print .
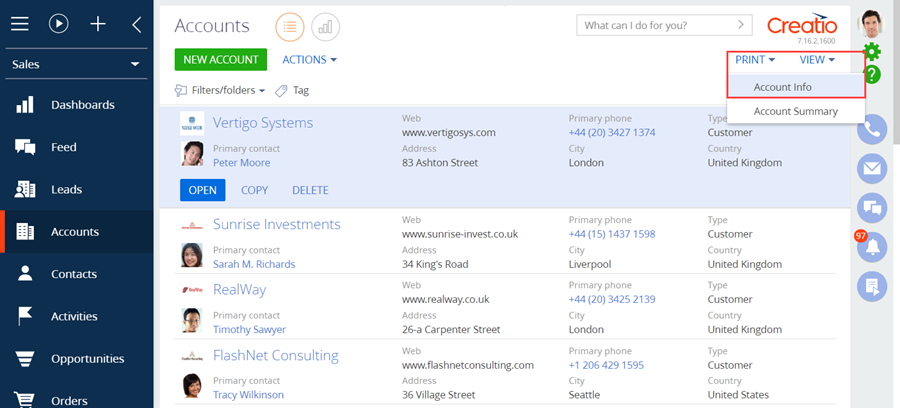
The report looks as follows.
Create MS Word report using custom macros
Case. Create an «Account Summary» report for the Accounts section edit page to display the following information about the account:
- Name .
- Type .
- Primary contact .
- Additional info . The annual revenue should be displayed for Customer accounts and the number of employees for Partner accounts.
The report must contain information about the date of creation and the name of the employee who created it.
Source code
You can download the package with an implementation of the case using the following link.
Case implementation algorithm
1. Create a new report

- Open the System Designer by clicking . In the System setup block, click the Report setup link.
- Click New report —> MS Word .
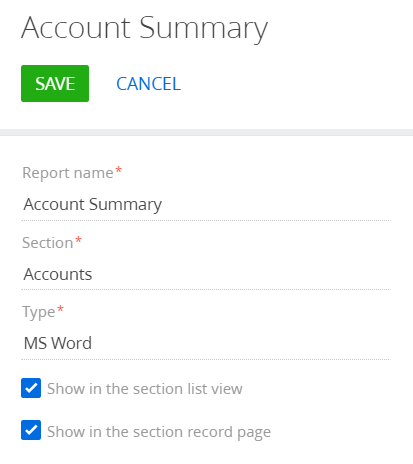
2. Set up the report display parameters
Set the following values in the parameter setup area (2):
- Report title – «Account Summary».
- Section – «Accounts”.
- Show in the section list view .
- Show in the section record page .
MS Word report setup page

Setting up the report display parameters
3. Implement custom macros
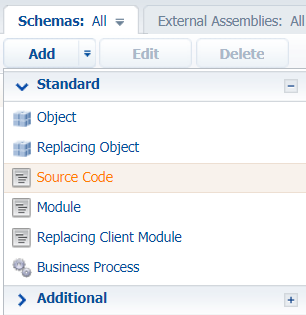
Go to the [Advanced settings] section –> Configuration –> Custom package –> the Schemas tab. Click Add —> Source Code . Learn more about creating a schema of the Source Code type in the Create the Source code schema» article.
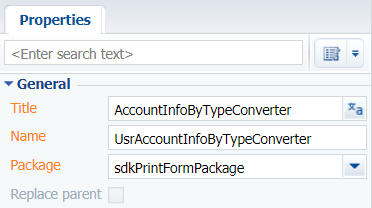
Specify the following parameters for the created object schema:
- Title – «AccountInfoByTypeConverter».
- Name – «UsrAccountInfoByTypeConverter».
Implement a macro class for receiving additional information depending on the account type. The complete source code of the module is available below:
namespace Terrasoft.Configuration < using System; using System.CodeDom.Compiler; using System.Collections.Generic; using System.Data; using System.Linq; using System.Runtime.Serialization; using System.ServiceModel; using System.ServiceModel.Web; using System.ServiceModel.Activation; using System.Text; using System.Text.RegularExpressions; using System.Web; using Terrasoft.Common; using Terrasoft.Core; using Terrasoft.Core.DB; using Terrasoft.Core.Entities; using Terrasoft.Core.Packages; using Terrasoft.Core.Factories; // An attribute with the [AccountInfoByType] macro name. [ExpressionConverterAttribute("AccountInfoByType")] // The class should implement the IExpressionConverter interface. class AccountInfoByTypeConverter : IExpressionConverter < private UserConnection _userConnection; private string _customerAdditional; private string _partnerAdditional; // Calling localizable string values private void SetResources() < string sourceCodeName = "UsrAccountInfoByTypeConverter"; _customerAdditional = new LocalizableString(_userConnection.ResourceStorage, sourceCodeName, "LocalizableStrings.CustomerAdditional.Value"); _partnerAdditional = new LocalizableString(_userConnection.ResourceStorage, sourceCodeName, "LocalizableStrings.PartnerAdditional.Value"); >// Implementing the Evaluate method of the IExpressionConverter interface. public string Evaluate(object value, string arguments = "") < try < _userConnection = (UserConnection)HttpContext.Current.Session["UserConnection"]; Guid accountId = new Guid(value.ToString()); return getAccountInfo(accountId); >catch (Exception err) < return err.Message; >> // The method for receiving additional information depending on the account type. // As the Id input parameter of the account. private string getAccountInfo(Guid accountId) < SetResources(); try < // Creating an EntitySchemaQuery class instance with the [Account] root schema. EntitySchemaQuery esq = new EntitySchemaQuery(_userConnection.EntitySchemaManager, "Account"); // Adding the [Name] column from the [Type] lookup field. var columnType = esq.AddColumn("Type.Name").Name; // Adding the [Name] column from the [EmployeesNumber] lookup field. var columnNumber = esq.AddColumn("EmployeesNumber.Name").Name; // Adding the [Name] column from the [AnnualRevenue] lookup field. var columnRevenue = esq.AddColumn("AnnualRevenue.Name").Name; // The records are filtered by the account Id. var accountFilter = esq.CreateFilterWithParameters( FilterComparisonType.Equal, "Id", accountId ); esq.Filters.Add(accountFilter); // Retrieving an entity collection. EntityCollection entities = esq.GetEntityCollection(_userConnection); // If the collection is not empty, the method will return the corresponding // data depending on the account if (entities.Count >0) < Entity entity = entities[0]; var type = entity.GetTypedColumnValue(columnType); switch (type) < case "Customer": return String.Format(_customerAdditional, entity.GetTypedColumnValue(columnRevenue)); case "Partner": return String.Format(_partnerAdditional, entity.GetTypedColumnValue(columnNumber)); default: return String.Empty; > > return String.Empty; > catch (Exception err) < throw err; >> > >
Populate the localizable strings of the report with the following values:
Setting up the localizable strings
| Name | English (United States) | Russian (Russia) |
|---|---|---|
| PartnerAdditional | Number of employees persons | Number of employees people |
| CustomerAdditional | Annual turnover | Annual revenue |
After making changes, save and publish the schema.
Go to the Advanced settings section –> Configuration –> Custom package –> the Schemas tab. Click Add —> Source Code .
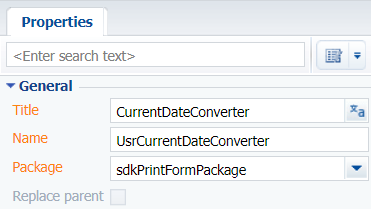
Specify the following parameters for the created object schema:
- Title – «CurrentDateConverter».
- Name – «UsrCurrentDateConverter».
Implement a macro class for retrieving the current date. The complete source code of the module is available below:
namespace Terrasoft.Configuration < using System; using System.CodeDom.Compiler; using System.Collections.Generic; using System.Data; using System.Linq; using System.Runtime.Serialization; using System.ServiceModel; using System.ServiceModel.Web; using System.ServiceModel.Activation; using System.Text; using System.Text.RegularExpressions; using System.Web; using Terrasoft.Common; using Terrasoft.Core; using Terrasoft.Core.DB; using Terrasoft.Core.Entities; using Terrasoft.Core.Packages; using Terrasoft.Core.Factories; // An attribute with the [CurrentDate] macro name. [ExpressionConverterAttribute("CurrentDate")] // The class should implement the IExpressionConverter interface. class CurrentDateConverter : IExpressionConverter < private UserConnection _userConnection; // Implementing the Evaluate method of the IExpressionConverter interface. public string Evaluate(object value, string arguments = "") < try < _userConnection = (UserConnection)HttpContext.Current.Session["UserConnection"]; // The method returns the current date. return _userConnection.CurrentUser.GetCurrentDateTime().Date.ToString("dd MMM yyyy"); >catch (Exception err) < return err.Message; >> > >
After making changes, save and publish the schema.
Go to the Advanced settings section –> Configuration –> Custom package –> the Schemas tab. Click Add —> Source Code .
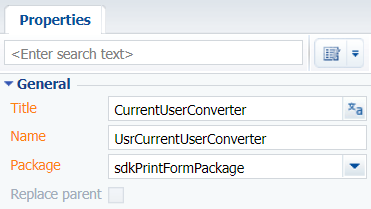
Specify the following parameters for the created object schema:
- Title – «CurrentUserConverter»
- Name – «UsrCurrentUserConverter».
Implement a macro class for retrieving the current user. The complete source code of the module is available below:
namespace Terrasoft.Configuration < using System; using System.CodeDom.Compiler; using System.Collections.Generic; using System.Data; using System.Linq; using System.Runtime.Serialization; using System.ServiceModel; using System.ServiceModel.Web; using System.ServiceModel.Activation; using System.Text; using System.Text.RegularExpressions; using System.Web; using Terrasoft.Common; using Terrasoft.Core; using Terrasoft.Core.DB; using Terrasoft.Core.Entities; using Terrasoft.Core.Packages; using Terrasoft.Core.Factories; // An attribute with the [CurrentUser] macro name. [ExpressionConverterAttribute("CurrentUser")] // The class should implement the IExpressionConverter interface. class CurrentUserConverter : IExpressionConverter < private UserConnection _userConnection; // Implementing the Evaluate method of the IExpressionConverter interface. public string Evaluate(object value, string arguments = "") < try < _userConnection = (UserConnection)HttpContext.Current.Session["UserConnection"]; // The method returns the contact of the current user. return _userConnection.CurrentUser.ContactName; >catch (Exception err) < return err.Message; >> > >
After making changes, save and publish the schema.
4. Set up the report fields

In the Set up report data block of the section working area (5), set up the fields to display in the report. To do this, click and select the Id column in the drop-down Column list. The current Id column will later be used in the custom macro to retrieve the current date.
Attention. Use the Id column as an input parameter for a custom macro.
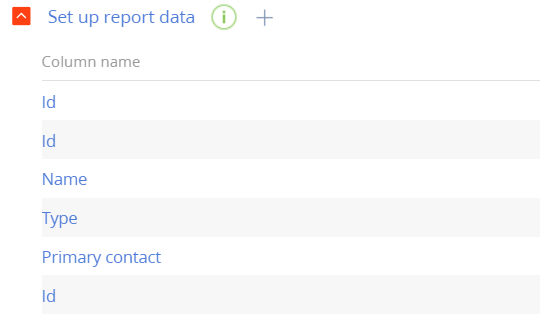
Use the same procedure to add Id (the column will later be used in the custom macro for retrieving the current user), Name , Type , Primary contact , and Id (the column will later be used in the custom macro for receiving additional information depending on the account type) to the column template.
The list of columns after this step is presented below.
5. Attach custom macro tags to the column names
Attention. First, publish the Source Code type schema that implements a custom macro must. Then, add the name of the macro to the template layout. If you refresh the page in Creatio, the macro will not be printed.
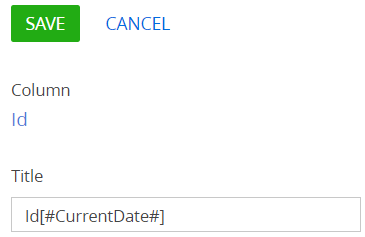
Change the property of the Id column of an Account object. To do this, take the following steps:

- In the Set up report data block of the section working area (5), double-click the title of the Id column or click in the column title bar.
- Change the [Id] value of the Title field to [Id[#CurrentDate#]] . [#CurrentDate#] is a the custom macro tag for retrieving the current date.
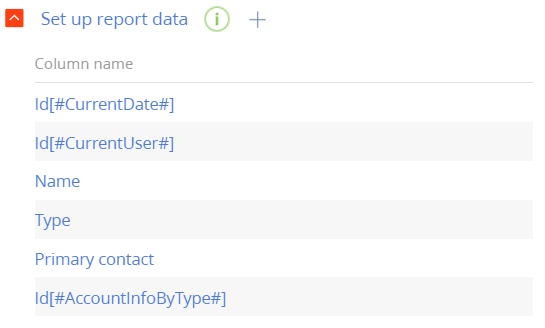
Use the same procedure to add more custom macro tags to the names of other Id columns.
- [#CurrentUser]# – for receiving the current user.
- [#AccountInfoByType#] – for receiving additional information depending on the account type.
The list of columns after adding custom macro tags is presented below.
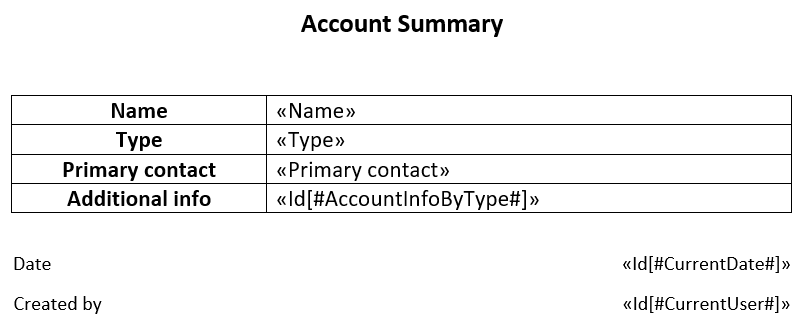
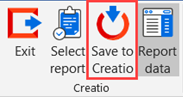
6. Set up the report template layout and upload the template to Creatio
To set up the template:
- Open any MS Word file.
- Click Connect on the Creatio plug-in toolbar.

Enter the username and password of the Creatio user. Click next to the Server field.


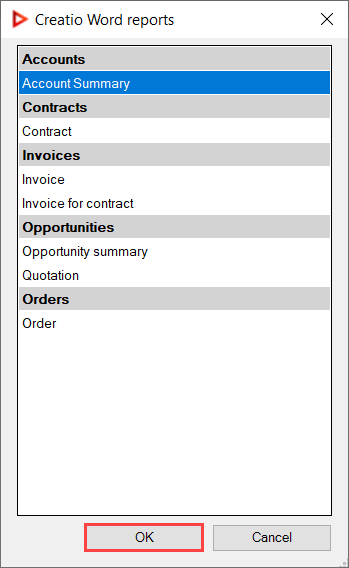
The report setup window looks as follows:
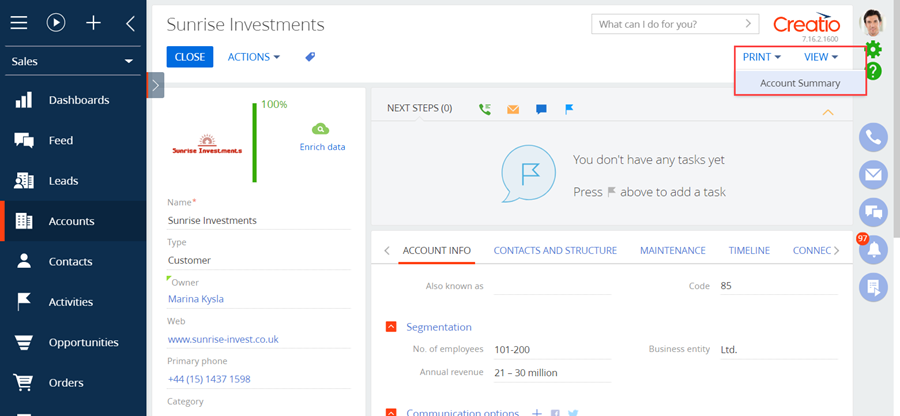
As a result, the «Account Summary» report will be available on the contact page under Print .
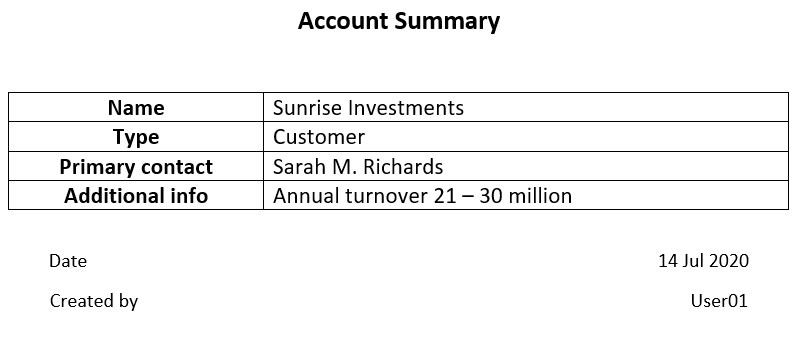
A report for accounts of the Customer type looks as follows.
A report for accounts of the Partner type looks as follows.